I recently changed paints, having discovered that ScaleColor paints from Scale75 really suit my style. I previously used the 3 colour system from Wargames Foundry, and still do occasionally when there is a specific colour I need. The method below works well with both ranges, so I'll describe the colours used in generic terms rather than the brand names. I think this will work with any paints.
I always undercoat with black even when I know I'll be painting white. It gives the most shadowed recesses and cracks a proper sense of depth.
The first stage is to get a nice mid to dark grey to act as the transition between the darkest areas and to undercoat the lighter shades. Water it down and use sparingly, avoiding only the most shadowed areas.
Be prepared to use a second coat when using thinned paint. The beauty of it is, as you add the next coat, it will lighten the previous coat acting as a highlight. You can therefore leave some parts of the previous layer showing in the shadows. This is not too important at this stage as most of this colour will be painted over.

Next, choose a mid grey, a pale slate colour, and make this a quite thin. The infamous milky consistency is a good one. Don't swamp the brush with paint, it will run everywhere; make sure there is only a little in the brush. With some paints this stage almost feels like a dry brush technique as the paint can last quite a while in the brush.
Definitely two coats here, reducing the size of the area covered each time. The darker layer below will shine through this translucent layer giving a sense of depth.
The figure on the right has had one coat of this mid tone.
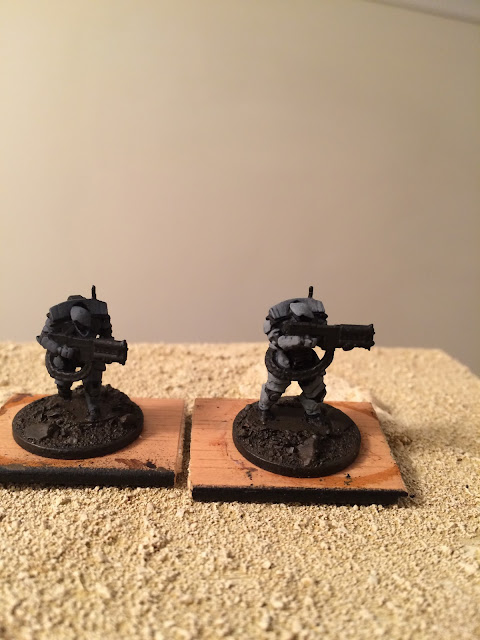
Both have now had two coats below.

Next comes the 'white'. It's actually pale grey. Give this a couple of coats, simply to make it show up. This is really like highlighting the figure and should be used quite sparingly in terms of coverage. You'll end up with something like the chap on the right in the next picture. The guy on the left needs a bit more of this coat.

I will finally add thin pure white to the edges and points that catch the light, but only after painting the rest of the figure. The pure white can be used on the coloured areas too.
I hope that has been useful. "Other methods exist", this is just how I do it and it's probably a bit of a time waste for many people. The above figures were already undercoated and took about 3 hours to get them both to that stage.
Looking good chap
ReplyDeleteCheers!
DeleteThanks Ralph!
ReplyDeleteHope it was useful.
Delete